Certify a Printer
Why Certify a Printer
For more than 40 years Freehand has been setting the pace for the screen print industry testing and qualifying printer models that created the industry standard. Times are different now; printers are not as readily available as they used to be. At Freehand we’ll continue to test printers to certify those that work best. However during the times you can’t get one of these certified printers or wish to test something new, we’re sharing with you our benchmark testing processes and built into AccuRIP a Certify Printer feature to develop and install your own custom printer binary file.
The printer must meet these requirements to start the process:
- The Printer Drivers are installed and working properly
- Printer drivers can be downloaded from the manufacturer’s website
- The Printer can print to film
- This can be tested by loading the printer with film then printing a test page
- The Printer can print with black dye ink like, Dmax Dye Ink.
- Some printers use bulk systems which makes it easy to fill with black dye while other printers use chip-based tanks. For those printers a refillable system such as auto chipped tanks or a continuous ink system also known as CIS will need to be found. Freehand recommends researching this before getting involved in deeper testing. Contact Freehand if you need assistance.
- The Printer is free of clogs
- Print a Nozzle Test with the OEM Printer Driver to ensure there are no clogs.
Mac or Windows
Printers can be certified by AccuRIP Emerald on either Mac or Windows. However, it should be noted that Printer Drivers running on Windows PCs often have more options for print settings, giving the greatest chance at success. The printer driver can be shared across a network in order to print from a Mac if the certified printer is setup on a PC. Find videos on printer sharing HERE.
Setting Up AccuRIP Emerald
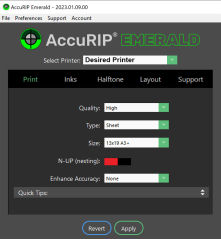
Open AccuRIP Emerald, select the printer, set the media size to the film media size you are using for your testing, then click Apply.
Print a Test Print
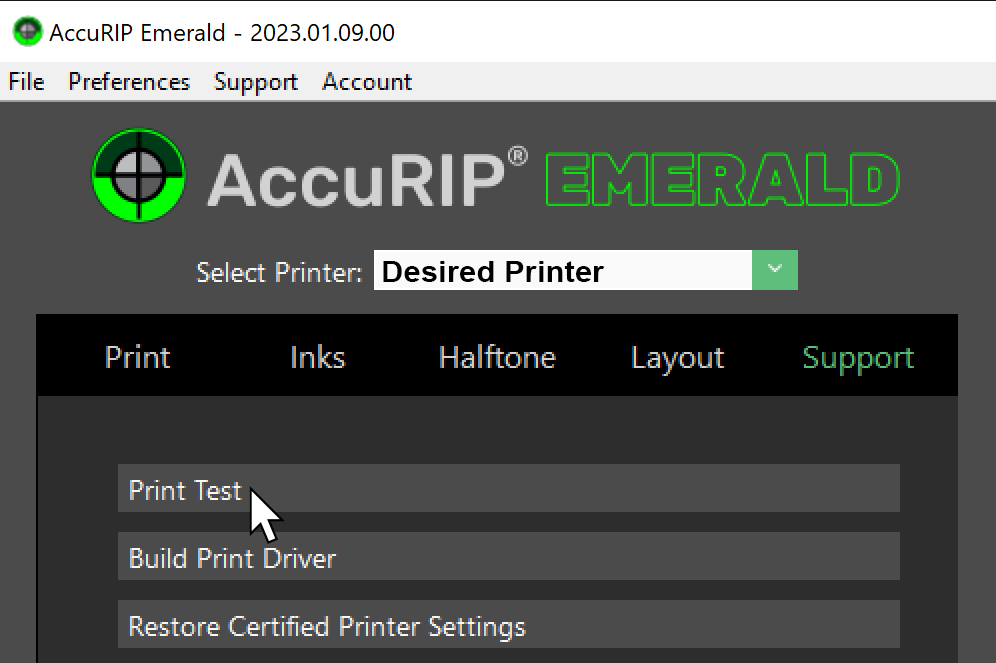
Next, go to the Support tab and Click Print Test, then click Print to send the test page through.
Use the OEM printer driver settings in order to achieve the best prints. Use these settings windows throughout this process. Some settings may be tucked away in sections and windows labeled for advanced settings. The availability of settings may also change depending on the media selected.
ABI or Select Tank?
First figure out if the printer is capable of producing prints with all color tanks (ABI).
With the printer filled with the stock color inks, set the media size to match the film loaded into the printer. Set media type to Photo Glossy Paper or something similar. Photo Glossy Papers often deliver the highest resolution prints, but with some printers it may be necessary to choose a Matte style paper. Click Print.
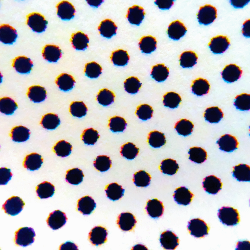
Take a look at the halftones of the test print under a loupe or a magnifying glass. If you see any color ink the printer supports ABI, if you see ONLY black ink print another test page with the media type set to some form of Matte Paper.
Again take a look at the halftones, if you see ONLY black ink the printer is likely unable to print from all tanks at once. Select Tank is the way to go when certifying.
If the ABI vs Select Tank testing revealed the printer will only print using Select Tank mode the choice is simple. Select Tank mode generally gives more control but ABI mode generally prints better quality. It’s a good idea to create both print modes to have ready if you ever have a severe clog in one of the color tanks and need to print from primarily another tank until the clog is resolved.
Create the Certified Printer
Once you’ve found the perfect settings, within AccuRIP Emerald go to File then Certify Printer.
1: Access the Certification Menu.
Open AccuRIP Emerald, while holding the control key on the keyboard (^ on Mac and Ctrl on Windows) click the “FILE” menu at the top of the screen.
2: Select “Certify Printer”
Click on “Certify Printer” to access the printer certification options.
3: Choose the Printer Model in the certification window.
Select the printer model to certify from the provided dropdown list.
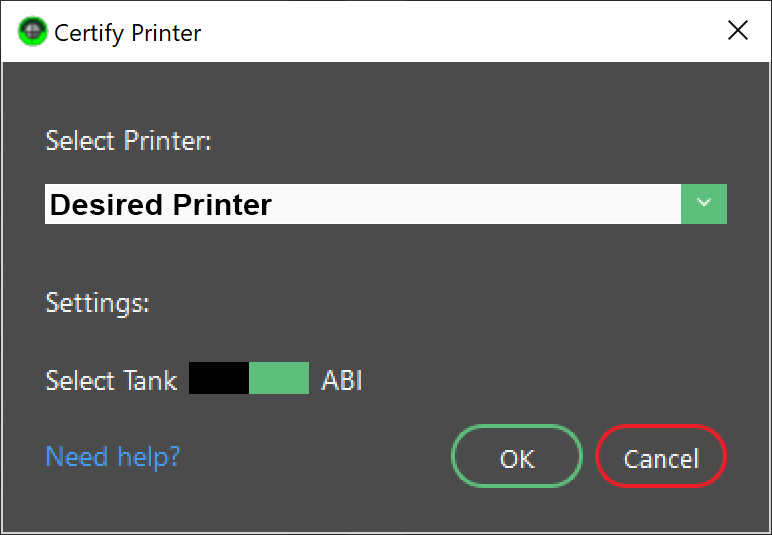
4: Select either Select Tank or ABI Option.
Choose “Select Tank” to configure settings for printing primarily via the CMY or K tanks or the “ABI” option to print from all tanks, depending on your preferences and requirements for the certification. Click “OK” to proceed.
5: Configure OEM Print Settings.
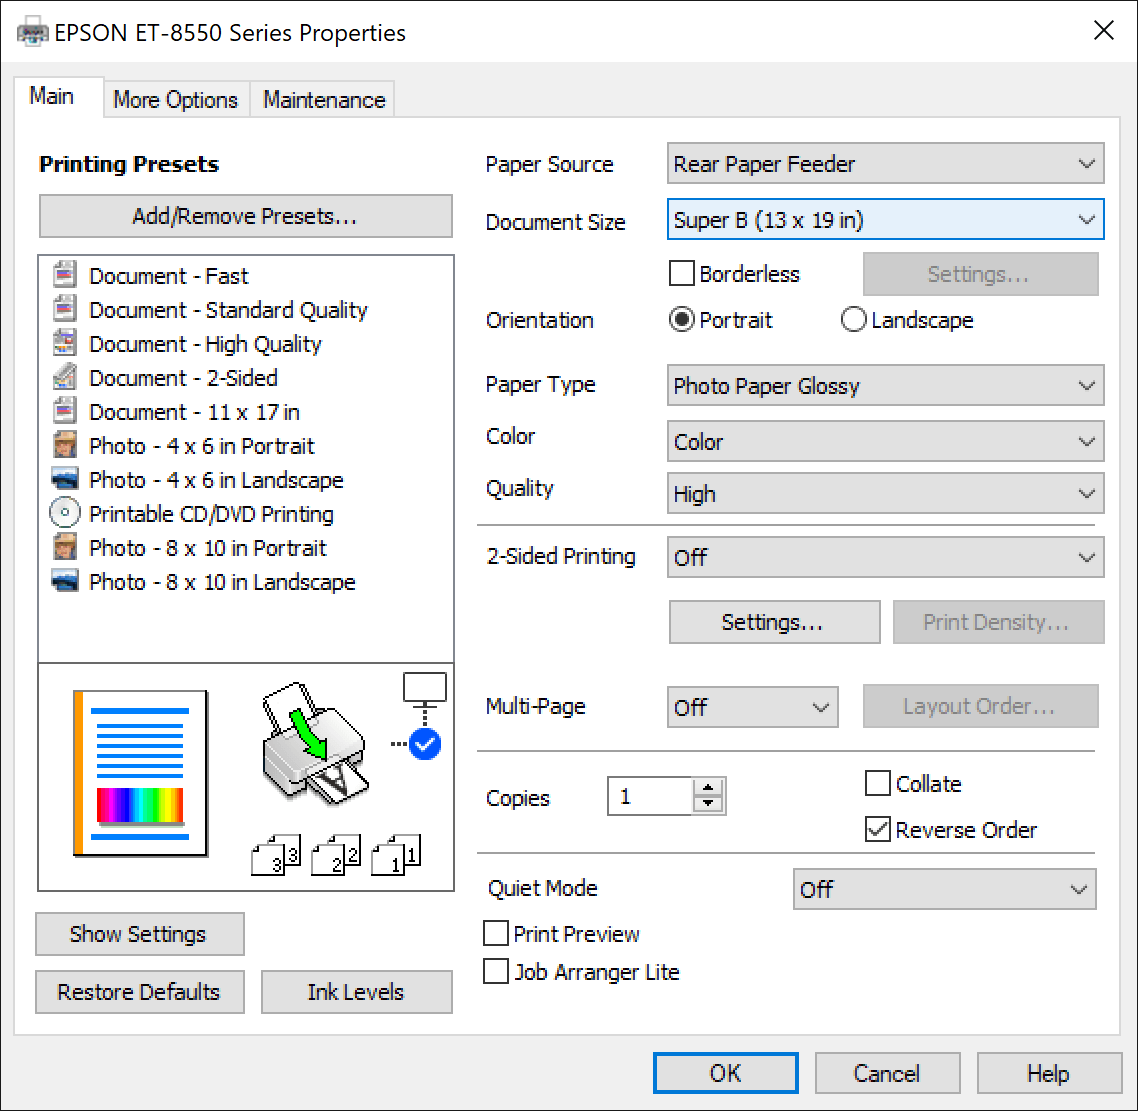
An OEM print window will appear, configure the settings to be certified for printing via AccuRIP Emerald.
• For ABI settings: As a starting point, for optimal results, select a photo paper type setting. Some wide format printers will require media types such as Enhanced Matte.
• For Select Tank settings: As a starting point, choose a photo paper type setting.
6: Adjust Printer Settings (Desktop vs. Wide Format)
• Desktop Printers: Enable the high-speed option (sometimes called bidirectional printing) for faster printing.
• Wide Format Printers: For the best print results, leave the high-speed option (sometimes called bidirectional printing) turned off.
Example of Settings Window
Different Printer Models and Drivers will Look Different
7: Adjust Color Settings
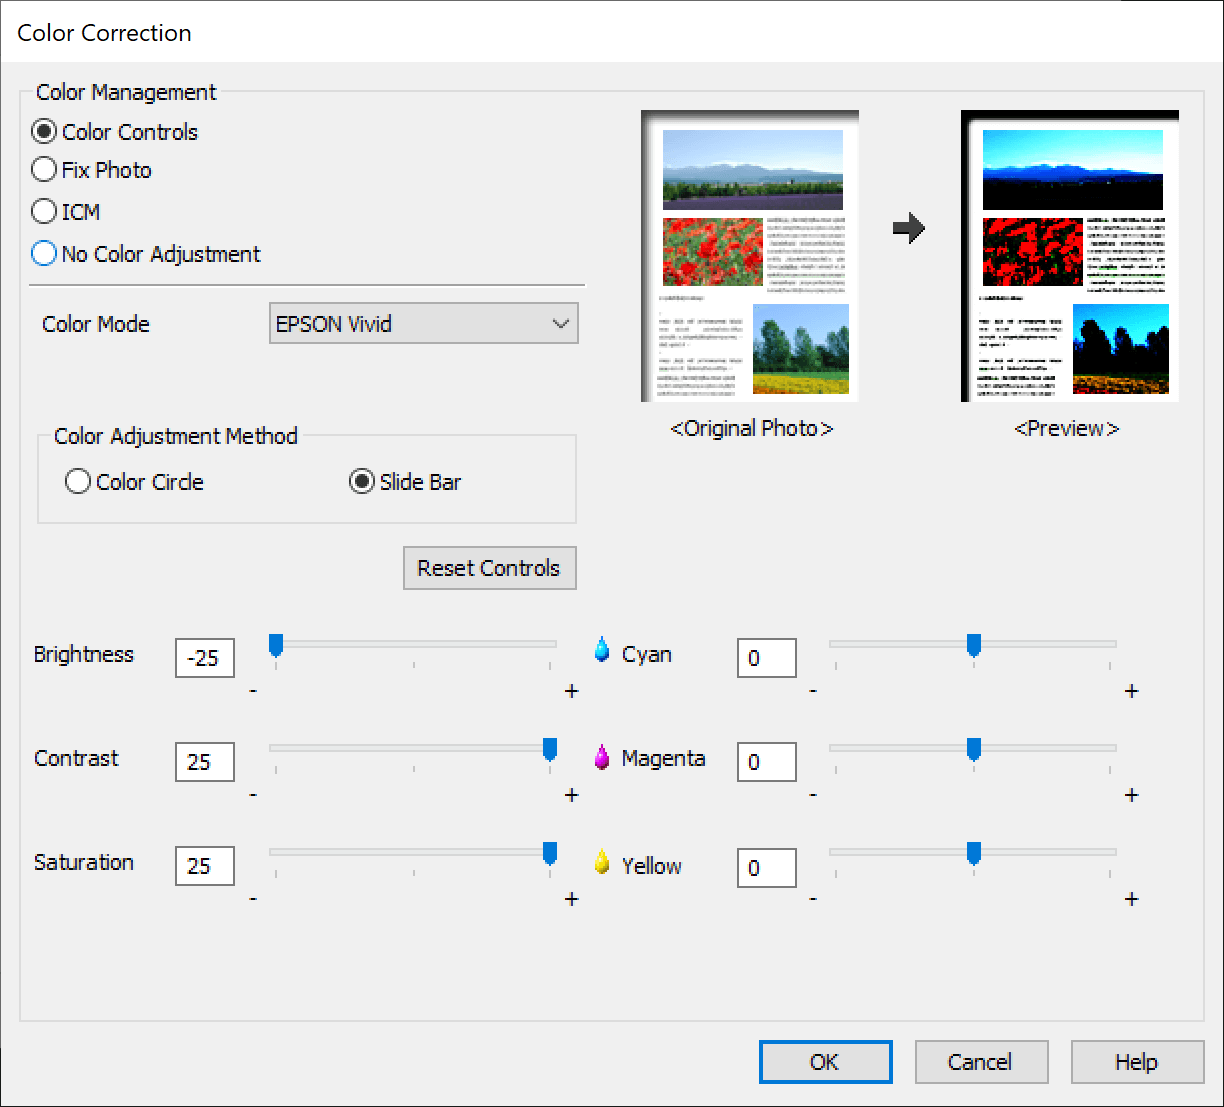
• Select Tank: If Select Tank is desired select “No Color Management” or “No Color Adjustment”
• ABI: If ABI is desired select Standard or Vivid then within the deeper color settings minimize brightness, and maximize Contrast and Saturation.
8: Optional: Adjust Ink Density (Wide Format Printers)
• Some wide format printer drivers offer an Extended Setting to control ink density, similar to adjusting Droplet Weight.
• Typically, with high-quality inks like Dmax®, adjusting this setting from “0” is not necessary.
• If more ink laydown is desired, you can increase this number accordingly.

9: Save and Confirm Certification.
Once all the desired settings are configured, it’s time to save the changes and complete the certification process.
• On Mac: Click the “PRINT” button.
• On Windows: Click “OK”.
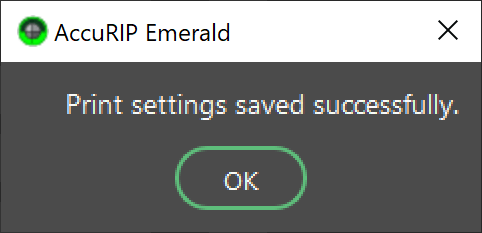
A window will appear, confirming that the print settings have been saved successfully. This
confirmation indicates that the certified bin file with the selected settings has been created.
Congratulations! You have now successfully certified your printer in AccuRIP Emerald.
Note: It’s important to ensure that the printer remains connected and properly configured for AccuRIP Emerald to utilize the certified settings effectively.
Verify Certified Printer
Select the printer within AccuRIP’s main window, print a test to double check everything looks good. For most printers, once certified the OEM print window will no longer be seen upon clicking print in Emerald. If the OEM Print window is seen you can double check to ensure it is using your saved settings.

Ink Density
OEM inks are formulated for paper printing. They will not achieve the standards for density and durability the screen print industry requires to expose screens. You should replace them with a proper film printing black dye ink.
At Freehand we manufacture Dmax black dye specifically for film printing from inkjet and bubblejet printers.
Fill the desired tank or tanks for Select Tank printing or all tanks for ABI printing with black dye ink, like Dmax, to get reliable, dense and durable UV-light-blocking prints.
Bypass Preview
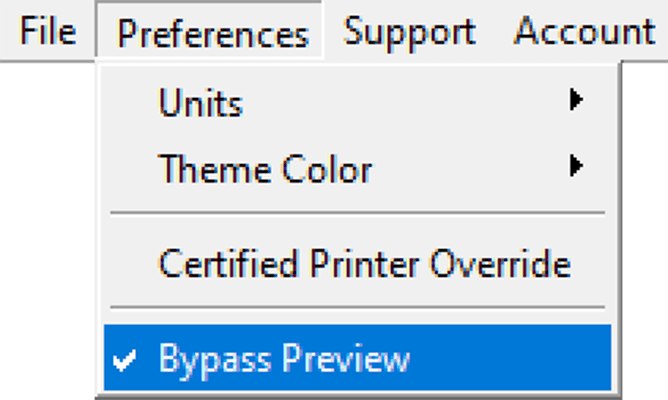
Save even more time by skipping AccuRIP’s preview window for every print. This is especially helpful when printing across a network. Go to preferences and select Bypass Preview.
Share Settings
Love the settings you found and want to share them with the screen printing community? Submit a ticket and Freehand will contact you about your printer settings and see to adding them to make your printer officially supported by AccuRIP Emerald.
Need More Help?
Get help from a live agent.

