User Guide
User Guide
Quick Overview
Upon installing Emerald a printer driver named “AccuRIP® Emerald” will be automatically added to the computer. This single universal printer driver is to be selected during printing to channel the print data into AccuRIP. The selection of the “AccuRIP Emerald” printer driver allows all PostScript separation print features to become available in a graphics program print window.
Open Emerald, select a printer, check or set the settings for your printer configuration media, ink, and halftone as needed. Click APPLY to lock in those settings. Settings are locked in and applied to files printed after the APPLY button has been clicked. Any print already in preview uses previous settings. The APPLY button should be dim while printing. An active APPLY button means there has been a change to a setting (or settings) that has not been locked in.
Print data flows into AccuRIP Emerald where a pixel perfect Proof Positive™ preview is displayed including solid areas and halftones if the data requires.*
Click PRINT to send print data to your printer.
* Looking to bypass the preview approval process, having prints go directly from your graphics program to your printer? From the Preferences window turn on “Bypass Preview”.
Workflow
Set up AccuRIP Emerald the way you like then go to work.
The settings in AccuRIP are applied to each print as it is processed. Update settings as needed, click Apply, then continue printing using the AccuRIP Emerald printer driver.
Design and print as normal from your favorite graphics programs such as Adobe Illustrator, CorelDRAW*, Spot Process® Separation Studio® NXT, Affinity Designer, and more. Create graphics using Spot or Process colors then from the Print window simply choose the “AccuRIP Emerald” printer driver, set the print document dimensions and the color separations you want to print. It’s that easy.
Your separations will appear in Emerald’s Proof Positive® preview. Approve the prints then click the PRINT button to send the prints to the printer.
With AccuRIP Emerald you can even Save a file using the DCS2.eps (single file) or Tiff format (separate files) to share fully processed files to be imported, send prints to a direct to screen printer RIP (DTS), or any other workflow that suits your needs. Saved separations require no additional RIP when printing. Great for freelancers with clients that don’t have a RIP of their own.
AccuRIP allows you to use your graphics programs the way they were designed to operate.
*CorelDRAW users will need to select the AccuRIP Emerald PPD from the Corel print window in order to print correctly.
Quick Start

Tabs vs Menus
Designed to be powerful and easy to navigate.
Some traditional menus still exist but have been greatly reduced through the use of tabs. Most everything you can do under a menu can now be handled from within a tab much like a web browser. Take a moment to explore all the features under both. Included under tabs are links to Quick Tips on this page delivering information and additional links to help you understand features, workflows, get support, buy supplies, and more.
Quality – Set the print and file save quality. The highest quality is the default and recommended setting. These settings affect the quality of the file produced and/or saved. Final print quality is handled directly by the printer driver. AccuRIP Emerald has been optimized to deliver the best print results allowable by the printer driver. Better printers produce better prints. When possible use a Photo class printer.
Type – Choose between Sheet and Roll media. Roll media is to be used with wide format printers that have a mechanical roll feed feature, not for desktop printers with passive roll attachments. Desktop style printers should use Sheet media settings.
Size – Choose a sheet Size to match sheet film dimensions or enter the width size for roll media. AccuRIP supports up to 24” (609.60mm) wide media. Maximum roll media length is 72” (1828.8mm).
N-UP (nesting) – When OFF a single separation or image will print as displayed in the preview. When ON AccuRIP Emerald will save film by using the dimension of the printed file “document” divided into the width of the film media “size” to display and print as many separations from a single file on each film as possible. However the print is displayed in the Proof Positive preview window is how it will print on film.
Be sure the width dimension of your file is less than half the width of the media size set in AccuRIP. Changes to settings will effect the next processed job, not jobs already processed and displayed in preview. Click the APPLY button to lock in your new settings.
Enhance Accuracy – Helps align print heads during printing. Prints a thin dashed vertical line at the edge of the total printable area. This line is not always visible on the final print as some printers have varying page margins. Choose from a variety of location options. For Canon thermal bubblejet printer users, this feature helps keep the print head at operational temperature to ensure proper ink delivery.
Quick Tips
Print Settings:
Quality: Sets the Print and Save file quality.
Type: Choose Sheet or Roll to match media type.
Size: Set to match loaded Sheet size or Roll width.
N-UP (nesting): Automatically prints multiple separations from a single file nested based on the dimension of the document vs the film media size. Media loaded into printer must match the media Size set.
More About N-UP Printing…
Enhance Accuracy: Adds a thin vertical line to each print improving print head accuracy.
Button Functions:
Revert restores previous settings.
Apply locks in new settings. New settings do not apply to prints already processed in preview.
Clear deletes current image from preview. Hold Alt/Option key and click Clear to clear all files in queue.
Save stores a file using DCS2.eps or .tif format.
Print sends data to selected printer driver.
Support Team…

Inks
This tab has controls for a variety of ink configurations based on printer model or selection. AccuRIP Emerald has been tuned to deliver the best overall print result. No added settings or control are needed when used with a proper high quality black film printing dye such as Dmax®.
Auto ABI is set by default for printers that are Certified by Freehand to support both Select Tank and Auto ABI. Load all ink tanks with Dmax black dye ink for film printing to achieve the most durable and dense prints. All ink tanks will dispense ink during printing.
Switch over to the Select Tank mode to select a primary ink tank of your choosing. All color inkjet printers contain CMYK ink tanks making this a universal setting.
For those wanting/needing to install Dmax into only the PhotoBlack (PK) ink tank select the Black tank (recommended).
AccuRIP Emerald will use the selected tank as the primary ink delivery system. A powerful feature to extend the life of a printer that might have dead ink channels or during times when the printer has a severe clog in one or more sections of the print head. The PhotoBlack (PK) ink tank is the recommended default setting. Results may vary based on printer model and setting. Generally the best to least print quality order is Black, Yellow, Magenta, then Cyan. Small amounts of maintenance ink may still be dispensed from non selected tanks during printing. Test your printer’s performance.
Quick Tips
Ink Mode Toggle:
An active green toggle appears for certified printers. Certified printers are capable of switching between the All Black Ink® mode (ABI) and Select Tank. A dimmed toggle set to the neutral position displays when a printer is not certified. You can still print using a non-certified printer, making adjustments directly in the manufacturer printer driver window, or certify a printer from the File menu Certify Printer feature to activate this toggle.
Fill all ink tanks with Dmax® dye ink to achieve the most dense and durable prints.
Select Tank mode sets a primary ink tank.
Button Functions:
Revert restores previous settings.
Apply locks in new settings. New settings do not apply to prints already processed in preview.
Clear deletes current image from preview. Hold Alt/Option key and click Clear to clear all files in queue.
Save stores a file using DCS2.eps or .tif format.
Print sends data to selected printer driver.
Support Team…

Epson Stylus 1430/1400 All Black Ink™ (ABI) features
For users of these two legendary legacy industry standard model printers Emerald continues support with robust options and controls via USB only.
Switch between MONO or ABI mode. Print using the single black ink cartridge in MONO or using all ink tanks in ABI mode.
Coverage – Choose setting 1, 2 or 3 to increase or decrease ink droplets applied to a single droplet location. 2 droplets is the default.
Droplet Weight – Set 1-15 to increase or decrease the amount of ink deposited during printing. 12 is the default.
Ink Tanks – Check ink tanks to dispense ink. Custom configure settings based on your needs.
* Feature will not override an ink tank(s) reporting an expired chip (empty tank). Epson printers demand all ink tanks be ready to print in order for the printer to function properly.
Click APPLY to lock in any settings changes before the next print. Settings effect new prints.

Halftone
These settings only apply to/affect prints that require halftones. Prints/separations properly set up to print as solid, dense spot colors are not affected by halftone settings. When a file has values between 1% and 99% tint/opacity those areas will automatically and properly be halftone. Spot color separations set up at 100% tint/opacity will print solid black. AccuRIP will handle things properly as dictated by the print file and graphics program.
Shape – Choose between Round, Ellipse, or Line screening styles.
Screen – By default 30 is the line screen most commonly used by screen printers. Lower numbers print as course halftones, while higher numbers produce finer halftones.
Mesh Calculator – Click the calculator icon then choose a mesh count. Based on the factor setting AccuRIP will auto calculate the proper halftone line screen to prevent mesh to halftone moiré. Industry standard factor is 5. Consult with your mesh provider for their best factor based on thread diameter and more.
Angle – Sets the angle for halftone printing. The recommended default angle is 22.5 degrees for all prints. This is the most screen print friendly angle that prevents “film to screen” and “screen to fabric” moiré.
Use Settings – When ON the settings above override all settings in a graphics program print window regarding halftone. Every file printed through AccuRIP that requires halftone screening will use these settings. When OFF AccuRIP Emerald will process the halftone settings from the graphics program. Default and recommended setting is ON.
Quick Tips
Halftone Settings:
Shape: Changes halftone shape (style).
Screen: Changes line screen frequency (dot size).
Angle: Changes degree of angle. 22.5 (recommended).
Mesh Count Calculator: Calculates the proper halftone frequency based on mesh count to avoid screen moiré. Factor default of 5 is common. Consult with your mesh manufacture for their factor.
Use Settings:
ON, AccuRIP halftone settings override the settings from a graphics program. Prevents moire´ (recommended).
OFF, halftone settings from a graphics program will be honored.
Button Functions:
Revert restores previous settings.
Apply locks in new settings. New settings do not apply to prints already processed in preview.
Clear deletes current image from preview. Hold Alt/Option key and click Clear to clear all files in queue.
Save stores a file using DCS2.eps or .tif format.
Print sends data to selected printer driver.
Support Team…

Layout
Placement allows the image to be moved around the displayed media in preview. Images can be moved around based on the available space between the image or art board size vs available media area.
Media “size” must be set and Applied under the Print tab prior to files entering AccuRIP Emerald. Image Placement may be changed at any time prior to printing. Click APPLY after each change.
Preset layout positions are offered under the Placement pop down menu.
Custom allows images to be freely placed anywhere in the displayed media area using the X and Y scroll arrows.
Quick Tips
Placement:
Choose any of the preset layout positions to reposition a print image on the media area shown.
Choose “Custom” then use the X and Y values to reposition.
Click APPLY to lock in settings before printing.
Placement feature works best when N-UP (nesting) located under the Print tab is OFF.
Button Functions:
Revert restores previous settings.
Apply locks in new settings. New settings do not apply to prints already processed in preview.
Clear deletes current image from preview. Hold Alt/Option key and click Clear to clear all files in queue.
Save stores a file using DCS2.eps or .tif format.
Print sends data to selected printer driver.
Support Team…

Support
Print Test – Displays an embedded TEST File used to test the printer connection and the settings’ results.
Build Print Driver – Reinstalls the AccuRIP Emerald print driver into the computer OS print system.
Reset Certified Printer Settings – Resets stock Certified Printers’ settings. Does not affect custom user defined Certified Printers
How to Videos… – Links to a webpage with helpful videos.
Order Supplies… – A quick way to order essential business supplies directly from Freehand.
Support Team… – Submit a Tech Support Ticket.
Secure Agent Login… – Use only when in contact with a Support Agent.
User Guide… – Links to this User Guide.
Reset Default Settings – Resets all settings back to factory defaults.
Show Quick Start… – Opens the Quick Start window each time AccuRIP Emerald is launched. Window can be dismissed by clicking the “Don’t Show Again” option.
Check for Update… – Links to a webpage with information regarding current available version.

Reprocess Window
Have a job to print that needs halftone screening different than your everyday screening needs. AccuRIP makes it easy with the ability to “reprocess” a job in preview apply a temporary change to only the current file in preview. This prevents the need to change then change back halftone settings in the main UI streamlining your workflow.
How it works –
With a job in preview click the Reprocess button. A secondary Halftone screening window appears giving you the ability alter the Shape, Screen and Angle. Make your changes then click Reprocess to see the update. When ready click Save. The updated screened image is displayed in the main UI preview ready to print.
These changes apply only to the one file in preview. All other AccuRIP settings and file already in Queue remain unaffected.

Slide Out Tray
A space saving slide out tray exposes helpful Navigation and Print Queue windows. Click the green arrow located in the upper right corner of the main UI to open and close this tray.
Creating tabs –Click and hold the title bar then drag and release one window on top of another to create tabs. Click the tabs to show a single window at a time.
Releasing tabs –Click and drag the title bar for either of the tabbed windows to the highlighted open area of the Slide Out Tray and release to return to a two window viewing state.
The entire sliding tray is opened can closed by clicking on the green arrow located in the upper right corner of the Main UI.
Windows in the Slide Out Tray can be closed and opened using the Window Menu or the close “x” icon in the title bar of the windows.


Navigation Window
Located in the slide out tray, this feature services the main UI Proof Positive® Preview when in Zoom mode. Zoom in using the Magnify (+) or Max features then click and drag the green Zoom Focus feature to any portion of the image you wish to see.

Queue Window
Located in the slide out tray, this feature list first the image by name “in Preview” then all files in queue awaiting preview then printing.
The image “in Preview” can be Cleared/Deleted by using the “Clear” button in the Main UI window. All other files in queue can be selected then Cleared/Deleted?Trashed by clicking on the Trash Can icon.
Files other than the image “in Preview” can be selected then clicked and dragged to alter their position in the queue list. Multiple files can be selected and moved or Trashed by clicking with the Shift, Command, or Control keys depending on the use of either MacOS or Windows OS.

Preferences Window
Color Theme – Switch color theme between Gray and Black.
Units: Switches the Roll media values from Metric Millimeters to Imperial Inches.
Input Hot Folder – Select a folder via Browse. AccuRIP will automatically process postscript (.ps) files from this folder. Great for advanced user with advanced knowledge of the PostScript workflow and shared drives on a local network.
DTS Hot Folder – Select a folder via Browse. When DTS Hot Folder is the selected printer AccuRIP will “print” .tif files to the selected Hot Folder for use with a separate RIP/printer.
Certified Printer Override – Forces open the OEM Printer Preferences window before printing. Use this feature only when in need of special results based on media and ink configurations. Read the Certify Printer User Guide or Consult with Support Agents to learn more.
Bypass Preview – Skips approval process of files in the Proof Positive Preview. When AccuRIP is open as soon as a file is processed it is sent straight to the printer.

Menus
AccuRIP Emerald (MacOS) :
Preferences – Opens the Preferences window.
File:
Print Test – Displays the embedded TEST File used to test the printer connection and the settings’ results. Also available in Support Tab
Exit (Windows) – Closes the program
Edit (Windows):
Preferences – Opens the Preferences window.
Support:
Offers duplicate functions and web links displayed under the Support Tab.
Account:
Manage My Account… – Open the Freehand License Manager (FLM) login window. Users can fully control a software license 24/7 even if the original computer hardware is lost, stolen, or broken.
Logout – Displays the current account login name. Allows for instant deactivation of a software license for fast license switching.


Buttons
APPLY and REVERT – Becomes available any time a change is made to current settings. During everyday operation these buttons should be dim. Dim buttons mean the last change(s) made to settings have been locked in to be applied to the next and every following print.
Revert – Before clicking APPLY, restores the last saved settings before changes were made.
Apply – Locks in NEW settings, applying settings to the next print and every print until the settings are updated and applied.
Reprocess – Opens a secondary Halftone screening window. In the Re-screening Halftone window also click the Reprocess button to apply changes.
Clear – Clears the current image displayed in preview. Print data auto clears upon printing. The next print in the queue will be displayed upon clearing the current print in Proof Positive preview. Hold Alt/Option key and click Clear to Clear All. This removes the current print in preview and a ALL prints waiting in the queue.
Save – Choose between DCS2.eps (single file) or tiff (separate file per separation).
DCS2.eps – Saves all print data to a single file, loading them as separate spot colors when working with another RIP or importing the file into a graphics program. Print data is saved including halftone line screen data (if applicable) to be shared or imported into other programs for final output.
TIFF – Saves multiple separations as individual .tiff files including halftone line screen data (if applicable) to be shared or imported into other programs for final output.
Print – Sends print data in preview to the selected printer driver.

File Data Display
1 of … – displayed in the upper right corner above the Proof Positive preview, shows the amount of separations involved in the project. Click the arrows to switch between previews.
Print and Film Size – Displayed in the lower right corner below the Proof Positive preview. Use as an approval before printing to ensure the printed image will fit on the film media loaded in the printer.
Print Size – Displays the dimensions of the “print” (total print data).
Film Size – Displays the size of the media (sheet or roll) applied under the Print Tab. Applied Sheet media size is displayed. Applied Roll media width along with custom media height set in the file is displayed.

Tools
Pan Tool – An icon of Crossed Arrows, this tool is available when the preview is in a zoom factor greater than 100%. Moves the image data around the Proof Positive preview window. For a faster more accurate Pan experience use the Navigation Window Zoom Focus feature.
Zoom In – An icon of a + Magnifying Glass, select and click on an area to zoom in and center in the Proof Positive preview window. This tool is available until Max zoom has been reached.
Zoom Out – An icon of a – Magnifying Glass, select and click on an area to zoom out and center in the Proof Positive preview window. This tool is only available when in a zoom factor greater than 100% (Fit).
Fit – Restores the Proof Positive preview back to 100% “true” scale displayed in proper orientation on the film media.
Max – A quick zoom feature to display a print at high quality and detail sometimes not seen in lower preview zoom factors. For a faster more accurate Pan experience use the Navigation Window Zoom Focus feature.
Update Available – AccuRIP auto detects newer versions alerting users to a free update. A pop up banner will also appear. Click to go to webpage documenting new features.

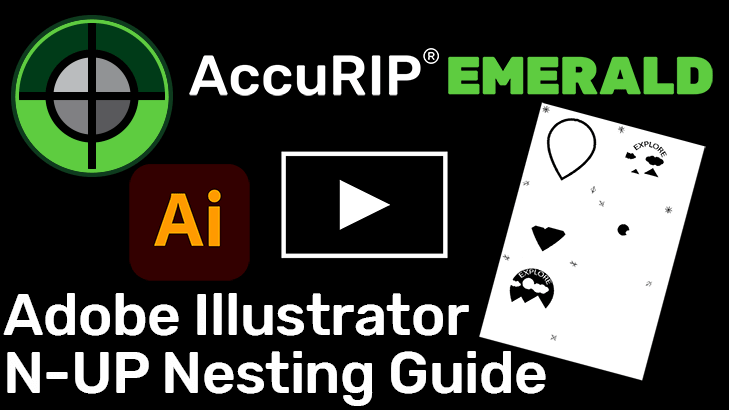
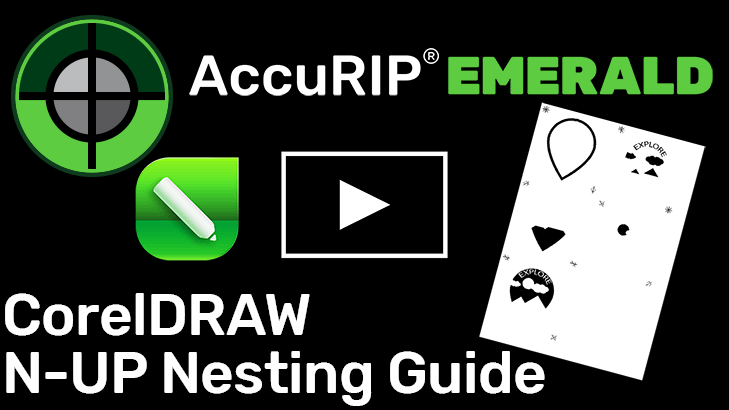
N-UP (Nesting)
N-UP (nesting) is a tool to automatically place as many separations on a single film to save film, time, and money. AccuRIP Emerald calculates the media size set in the RIP against the file dimensions printed along with the number of color separations. Proof your nested images in the Proof Positive preview.
For Nesting to work properly the artboard of the art file should be as close to the size of the art as possible. Refer to the following videos on how to accomplish this with Adobe Illustrator or CorelDRAW.