The Art of Tensioning Screens
Mastering the Art of Tensioning Screens for Optimal Screen Printing Results
Tensioning screens for screen printing is a crucial step to ensure high-quality prints. Proper screen tension affects the sharpness of the print, the accuracy of the design, and the overall printing process.
Here’s a step-by-step guide on how to tension screens effectively:

1. Gather the Necessary Tools and Materials
Screen Frame: This can be made of aluminum (preferred for durability) or wood.
Mesh Fabric: Polyester mesh is commonly used for screen printing.
Screen Tensioning System: You can use either a manual tensioning tool (for DIY) or a pneumatic or mechanical stretching device (for professional setups).
Adhesive (Frame Glue): For securing the screen mesh to the frame.
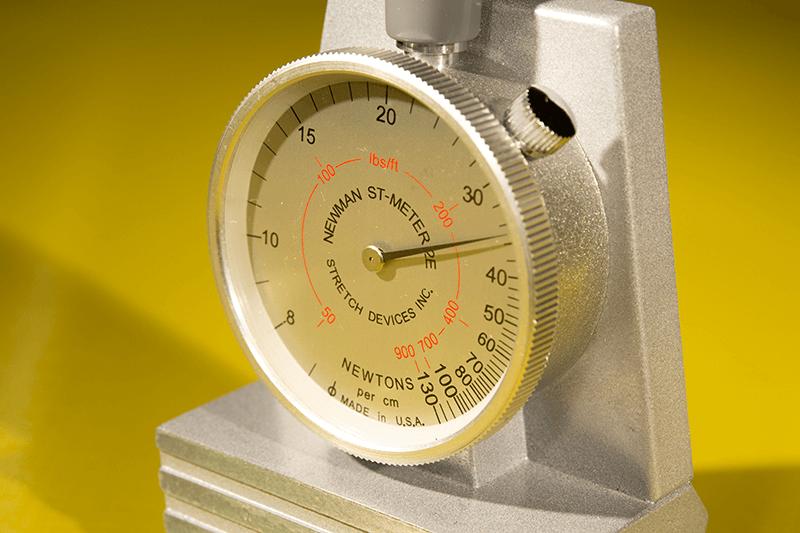
Tension Meter (optional but recommended): To measure the exact tension of the screen.
Squeegee or Roller: To smooth out the mesh.
Frame Adhesive Activator (if using glue) and staple gun (optional for wooden frames).
Mesh Adhesive Tape: For securing edges after gluing.
2. Prepare the Frame and Mesh
For Wooden Frames:
Sand and clean the frame thoroughly removing any old adhesive, ink, or dirt. This ensures that the new mesh adheres properly.
For Aluminum Frames:
Grind and wipe the frame clean with a degreaser or alcohol-based cleaner to ensure no oils or residues are left.
3. Stretch the Mesh
Manual Stretching Method (For Beginners or DIY):
Lay the frame flat on a sturdy surface.
Cut the mesh fabric at least 4–6 inches larger than the frame on all sides to ensure enough material for stretching.
Clamp or secure one side of the mesh to the frame. You can use spring clamps or manual tensioners to hold the mesh in place temporarily.
Using a squeegee or roller, begin stretching the mesh by pulling it tight from the opposite side of the frame. Start with one side, and work your way around the frame, pulling the mesh evenly in all directions.
Tip: Stretch the mesh diagonally to prevent sagging in the corners.
Apply pressure while stretching to avoid wrinkles or loose spots in the mesh.
Using a Screen Stretching System (For Professional or Consistent Results):
Place the screen mesh in the tensioning system. Mechanical or pneumatic systems typically have stretching clamps or hooks that grab the edges of the mesh.
Activate the tensioning system to begin stretching the mesh. Adjust the tension evenly across the entire screen.
Use the tension meter to ensure the mesh is stretched to the correct tension (measured in Newtons/cm). For most screen printing applications, a tension between 20–25 N/cm is ideal, but it may vary based on the mesh count. Tighter mesh requires less squeegee pressure producing brighter prints. Repeatable registration will also be improved.
4. Secure the Mesh to the Frame
Using Adhesive:
Once the mesh is tensioned, apply frame glue or adhesive around the edges of the frame where the mesh meets the frame. Use a brush or applicator to spread the glue evenly.
Allow the glue to set (follow the manufacturer’s instructions on drying times).
If the adhesive requires an activator, spray or apply it after the glue dries to harden the bond.
Once the mesh is securely glued, trim the excess mesh from the edges of the frame using a sharp blade.
Do not use Staples (for Wooden Frames):
Staples can be uneven to the frame and may cause the glass of an exposure unit to crack under pressure. Best to use glue.
5. Measure the Tension
Use a tension meter to check the tension in different areas of the screen.
Ideal tension should be uniform across the screen (within 1-2 N/cm difference).
If areas of the mesh are under-tensioned, the screen may produce inconsistent prints or lose registration accuracy.
6. Check for Consistency
Examine the screen for any wrinkles, loose spots, or uneven tension.
If there are issues, re-tension the screen or make adjustments before proceeding to the coating and exposure process.
The mesh should feel tight and drum-like when you tap it.
7. Cure and Finalize
Allow the adhesive to fully cure (if using glue) according to the manufacturer’s recommendations.
Once cured, the screen is ready to be coated with emulsion and used for exposure.
Key Tips for Successful Screen Tensioning:
Proper tension is critical for sharp and consistent prints. A loose screen will result in blurred images or ink bleeding, as well as repeatable registration issue.
Always check the tension levels with a tension meter, especially for detailed or multi-color printing where precision is key.
Regularly inspect and maintain your frames and screens. Re-tension or replace them when they start losing tension or showing signs of wear.
For high-volume printing or more demanding jobs, investing in a professional screen stretching system can ensure consistent tension across all screens.
Conclusion:
Tensioning screens correctly ensures the longevity of your screens, the accuracy of your prints, and the quality of your work. While manual tensioning is suitable for small shops and hobbyists, professional setups with stretching systems offer better control and consistency for large-scale or high-detail printing. Regardless of the method, ensuring proper and uniform tension across the screen will improve the overall quality of your screen printing projects.
Do some research into “self tensioning roller frames”. They are premium priced, but deliver a premium experience and print result. Your investment comes back quickly in time saved and quality.


