Find all our videos with full transcripts organized by product below.
You can also find our entire video catalog on YouTube!
Videos are arranged by categories below, click the tab buttons to expand and reveal videos
Separation Studio® NXT
NXT-Moves™ Designer
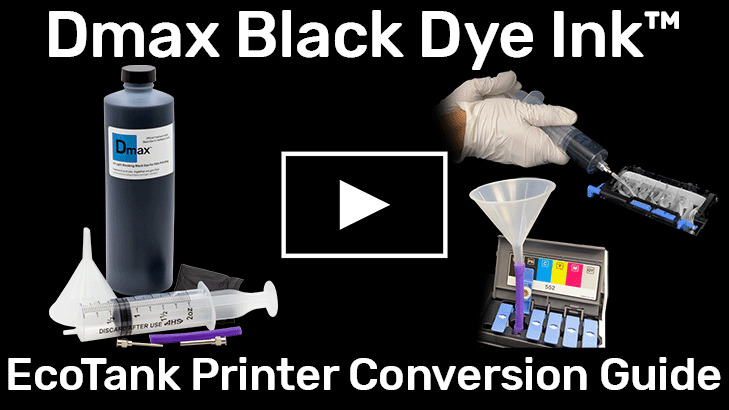
Dmax Ink
Keep Your Printer Happy
Tips for Screen Printers
Adobe Illustrator
CorelDRAW
AccuRIP® Emerald
Freehand License Manager
Amaze-ink™
Dark Star Dye Film™
Freehand and You
Adobe Photoshop
To provide the best experiences, Freehand uses technologies like cookies to store and/or access device information. Consenting to these technologies will allow the website to process data such as browsing behavior or unique IDs on this site. Not consenting or withdrawing consent, may adversely affect certain features and functions.
Freehand and you, together we got this.
Freehand and you, together we got this.
Freehand and you, together we got this.
Freehand and you, together we got this.
Freehand and you, together we got this.
Freehand and you, together we got this.
Freehand’s top rated printers are in BLUE.
| Brand | Model | Select Tank | ABI (All) | |||
|---|---|---|---|---|---|---|
| Canon | Pixma iX6820 / 6800 series* | YES | YES | |||
| Canon | Pixma iP8720 / 8700 seires* | YES | YES | |||
| Canon | Pixma Pro-100 | YES | ||||
| Canon | Pixma Pro-200 | YES | YES | |||
| Epson | ET-15000** | YES | YES | |||
| Epson | ET-14000 | YES | YES | |||
| Epson | ET-2720 | YES | ||||
| Epson | ET-8500 | YES | ||||
| Epson | ET-8550 | YES (13×19 Only) | ||||
| Epson | Artisan 1430 | YES | YES | |||
| Epson | Stylus 1400 | YES | YES | |||
| Epson | SC-P400 series* | YES | ||||
| Epson | SC-P700 | YES | ||||
| Epson | SC-P800 | YES | YES | |||
| Epson | SC-P900 | YES | ||||
| Epson | L-1300 | YES | YES | |||
| Epson | L-1800 | YES | YES | |||
| Epson | L-8160† | YES | ||||
| Epson | L-8180† | YES | ||||
| Epson | WF-7210 | YES | ||||
| Epson | WF-7710 | YES | ||||
| Epson | WF-7720 | YES | ||||
| Epson | XP-900 series* | YES | YES | |||
| Epson | XP-970 series* | YES | YES | |||
| Epson | XP-15000 | YES (13×19 Only) | ||||
| Epson | SC T3170X | YES*** | YES*** | |||
| Epson | SC T3270 / 3200 series* | YES | YES | |||
| Epson | SC T3475 / 3405 series* | YES | ||||
| Epson | SC T5270 / 5200 series* | YES (Up to 24″) | YES (Up to 24″) | |||
| Epson | SP-4880 | YES | ||||
| Epson | SP-7900 | YES | YES | |||
| Epson | SP-9890 | YES | YES | |||
| Epson | SC-P5000 | YES | YES | |||
* Series Printers can have different model numbers around the world but all use the same printer driver. Example 1: The Canon iX6820 and iX6850 are both 6800 Series printers. Both printers are supported by AccuRIP Emerald. Example 2: The Epson SC T3270 is a 3200 Series printer, any printer model in the 3200 series will be supported by AccuRIP Emerald.
** The Epson ET-15000 produces high quality prints using Dmax™ dye ink. The paper media sensor sometimes struggles to detect clear film media. The use of low tack paper tape or a paper carrier sheet may be required.
*** Freehand recommends filling ONLY the Black (BK) tank of the 3170X with Dmax Ink and leaving stock Epson CMY inks in the CMY tanks. Printing ABI out of the 3170x with Dmax in the Black tank will deliver quality films.
† Screen Print Community provided. AccuRIP Emerald users reporting success using OEM pigment and dye inks, including Dmax dye for better density and durability.
Freehand’s top rated printers are in BLUE.
| Brand | Model | Select Tank | ABI (All) | |||
|---|---|---|---|---|---|---|
| Canon | Pixma iX6820 / 6800 series* | YES | YES | |||
| Canon | Pixma iP8720 / 8700 series* | YES | YES | |||
| Canon | Pixma Pro-100 | YES | YES | |||
| Canon | Pixma Pro-200 | YES | ||||
| Canon | Pixma G1220 | YES | ||||
| Epson | ET-15000** | YES | YES | |||
| Epson | ET-16600 | YES | ||||
| Epson | ET-8500 | YES | ||||
| Epson | ET-8550 | YES | ||||
| Epson | ET-2720 | YES | YES | |||
| Epson | ET-2500 | YES | ||||
| Epson | Artisan 1430 | YES | YES | |||
| Epson | Stylus 1400 | YES | YES | |||
| Epson | SC-P400 series* | YES | ||||
| Epson | SC-P700 series* | YES | ||||
| Epson | SC-P800 series* | YES (Roll Only)*** | YES (Roll Only)*** | |||
| Epson | SC-P900 series* | YES (Sheet Only) | YES (Roll Only) | |||
| Epson | SC-T5200 | YES | YES | |||
| Epson | SP-4800 | YES | YES | |||
| Epson | SP-4880 | YES | YES | |||
| Epson | L-1300 | YES | ||||
| Epson | L-8160† | YES | ||||
| Epson | L-8180† | YES | ||||
| Epson | WF-7210 | YES | ||||
| Epson | WF-7710 | YES | ||||
| Epson | WF-7720 | YES | ||||
| Epson | WF-7840 | YES | ||||
| Epson | XP-15000 | YES | ||||
| Canon | TM-200 | YES | ||||
| Epson | SC 3100 series* | YES | ||||
| Epson | SC T3170X | YES | YES | |||
| Epson | SC T3270 / 3200 series* | YES | YES | |||
| Epson | SC T3700 series* | YES | ||||
| Epson | SC T5200 series* | YES | YES | |||
| Epson | SP-4900 | YES | YES | |||
| Epson | SP-7700† | YES | ||||
| Epson | SP-7800† | YES | ||||
| Epson | SP-7880† | YES | ||||
| Epson | SP-7890† | YES | ||||
| Epson | SP-7900 | YES | ||||
| Epson | SP-9700† | YES | ||||
| Epson | SP-9800† | YES | ||||
| Epson | SP-9880 | YES | ||||
| Epson | SP-9890† | YES | ||||
| Epson | SP-9900† | YES | ||||
| Epson | SC-P5000 | YES | ||||
* Series Printers can have different model numbers around the world but all use the same printer driver. Example 1: The Canon iX6820 and iX6850 are both 6800 Series printers. Both printers are supported by AccuRIP Emerald. Example 2: The Epson SC T3270 is a 3200 Series printer, any printer model in the 3200 series will be supported by AccuRIP Emerald.
** The Epson ET-15000 produces high quality prints using Dmax™ dye ink. The paper media sensor sometimes struggles to detect clear film media. The use of low tack paper tape or a paper carrier sheet may be required.
*** Freehand recommends using the P800 as a roll printer. If sheet is needed please submit a tech support ticket and an expert will get you set up for sheet within minutes.
† Screen Print Community provided. AccuRIP Emerald users reporting success using OEM pigment and dye inks, including Dmax dye for better density and durability.
AccuRIP Emerald is more capable than ever. Emerald can print an image from ANY printer on the planet!
That’s right, Emerald can print to any inkjet or laser printer, but is that printer capable of producing film positives that you need to expose a screen? Here’s how to know if a printer is right for you as a screen printer. These are the parameters Freehand uses to qualify a printer model.
Freehand believes in and is dedicated to the Screen Print Community. Working closely with Screen Printers on a wide variety of printer models and manufacturers Freehand offers support for many models. Screen Printers express success using AccuRIP Emerald with a variety of ink configurations using OEM Pigment inks as well as Dye ink. Those that use Dmax® dye as well as other brands of dye ink report better density and durable films. Users of both ink styles claim varying degrees of exposing success.
Dye vs Pigment Ink:
Dye ink such as Dmax™ is “the key” to converting any inkjet printer into a proper film printing device. Pigment ink is not visually dense or durable. Dmax™ dye bites into the microporous coating on film, delivering a dense, durable bond.
Media Sensor:
All inkjet printers have a media sensor. Some printer models have weak sensors detecting only opaque paper. Look for a printer that can detect film media without the use of a paper carrier sheet or paper tape strip.
Tank vs Cartridge Printers:
All tank printers will accept Dmax™ dye ink. Cartridge style printers require the use of a refillable ink cartridges. If using a cartridge style printer source refillable cartridges first. If not available, use a different model printer.
Photo-Class vs. Non-Photo-Class Printers:
Photo-class printers deliver the highest level of detail in the inkjet market and tend to be more expensive. However, non-photo-class printers are a practical and cost-effective option for common screen print needs.
– Mac and Windows
– 24/7 365 Dashboard for Total User Activation Control.
– FREE Emerald and NXT updates
– Unlimited Support
– 1L Dmax Dye
– 2 Boxes Dark Star Film (13×19 or 17″ Roll)
– 1 500mL Amaze-Ink Print Head Cleaner Kit
At Freehand we get it and we keep making things better.
Freehand and you, together we got this.
– Mac and Windows
– 24/7 365 Dashboard for Total User Activation Control.
– FREE Emerald and NXT updates
– Unlimited Support
– Dmax™ Ink Kit
– 1 L Dmax Dye
– 2 Boxes Dark Star Film (13×19 or 17″ Roll)
– 1 500mL Amaze-Ink Print Head Cleaner Kit
At Freehand we get it and we keep making things better.
Freehand and you, together we got this.
Running an older printer? Looking for answers? Reach out to us to learn more.
CLICK HERE


AccuRIP™ Ruby (Discontinued),
Separation Studio™ 4 (Discontinued)
Desktop Printer Models
Canon Pixma Pro-100*
Epson Artisan 1430
Epson Artisan 50
Epson Sure Color P400
Epson Sure Color P405
Epson Stylus Photo 1400/1410/1390
Epson Stylus Photo 1500W
Epson Stylus Photo R1800
Epson Stylus Photo R1900
Epson Stylus Photo R280/R285/R290
Epson Stylus Photo R2000/R2400
Epson Stylus Photo R3000
Epson WorkForce 1100/1110
Epson ET 2500/2550
Epson L355
Epson L1300
Epson L1800
Wide Format/Roll Printer Models
Epson P800**
Epson Sure Color T3000/T5000/T7000
Epson SureColor T3200/5200/7200
Epson SureColor T3270/5270/7270
Epson Sure Color P5000 (Standard)
Epson Sure Color P5000 (Commercial)
Epson Stylus Pro 3800/3880
Epson Stylus Pro 4000
Epson Stylus Pro 4450
Epson Stylus Pro 4800/4880 /4900
Epson Stylus Pro 7000/7600/7700/7800
Epson Stylus Pro 7880
Epson Stylus Pro 7890
Epson Stylus Pro 7900
Epson Stylus Pro 9450
Epson Stylus Pro 9600/9700/9800
Epson Stylus Pro 9880/9890/9900
Epson Stylus Pro 10600
Epson Stylus Pro 11880

AccuRIP™ BP and AccuRIP™ BP SE (Discontinued):
Black Pearl supports the same printers shown in the Ruby version list of compatible printers shown above.*
* Canon Pixma Pro 100 is supported by AccuRIP™ Ruby and Spot Process™ Separation Studio™ 4.
** Epson P800 is supported by AccuRIP™ Ruby and Spot Process™ Separation Studio™ 4, this printer is NOT supported in AccuRIP™ Black Pearl. Black Pearl SE supports the Epson P800 and T3270 only. Contact support agent for assistance.
AccuRIP™ Ruby, Black Pearl, and Black Pearl SE have been discontinued since 2019 being replaced/enhanced by AccuRIP™ Emerald. While Ruby, Black Pearl, and SE are no longer available for sale or distribution however the software may continue to operate on a healthy compatible computer environment. Any loss of control over the license requires an upgrade. Contact tech support online to learn more.
We mean it when we say, Freehand and you, together we got this. We put a plan into action to help you control your screen print art room costs. Guaranteed.
No matter how much the economy fluctuates, your costs are low and locked in for a full year at Freehand because you decided to save $592 on software and supplies right now.
We helped get the industry through COVID and international shipping slow-downs when others had no supplies or services to offer. We’re taking a stand once again to get you through today’s economic pains.
Our investment into supplies and services is our investment into your business. With strong participation from our customers Freehand will continue to make money saving promotions like this.
No matter how crazy the world gets around us, Freehand is here for you as we have been for more than 40 years with honest, valuable business solutions to ensure the success of your business ensuring everything in life it helps you achieve.
Need even more supplies? Freehand will guarantee 50% off any additional non software supplies with no minimum for a full year (shipping cost applied) beginning on the date of your purchase, ending 364 days later. We guarantee it!
*Free shipping applies only to contiguous United States on initial purchase.
We mean it when we say, Freehand and you, together we got this. We put a plan into action to help you control your screen print art room costs. Guaranteed.
No matter how much the economy fluctuates, your costs are low and locked in for a full year at Freehand because you decided to save $592 on software and supplies right now.
We helped get the industry through COVID and international shipping slow-downs when others had no supplies or services to offer. We’re taking a stand once again to get you through today’s economic pains.
Our investment into supplies and services is our investment into your business. With strong participation from our customers Freehand will continue to make money saving promotions like this.
No matter how crazy the world gets around us, Freehand is here for you as we have been for more than 40 years with honest, valuable business solutions to ensure the success of your business ensuring everything in life it helps you achieve.
Need even more supplies? Freehand will guarantee 50% off any additional non software supplies with no minimum for a full year (shipping cost applied) beginning on the date of your purchase, ending 364 days later. We guarantee it!
Want to take advantage of high savings just on supplies? Talk to us. We’ll find a plan that’s right for you.
Email us now at sales@solutionsforscreenprinters.com
*Free shipping applies only to contiguous United States on initial purchase.
New and improved offering 24/7 online user account control, faster workflow, improved stability, hardware/OS crash and internet outage protection
New and renewing users will receive Freehand License Manager Activation Codes.
Existing users may use the iLok system until expiration or migrate to Freehand License Manager to take advantage of new and improved features and workflows with no additional cost.
Migrating an Active iLok License to Freehand License Manager is quick and FREE!
Download and install the newest version of AccuRIP or Sep Studio from the Downloads section of the My Account. In the software Login window click “Sign Up” to create a Freehand License Manager account, and from your dashboard, click “Migrate iLok License”. Copy and paste the Activation Code from your My Account and click “Migrate”. That’s it! Now login to AccuRIP or Sep Studio from within the software.
An apply coupon button will automatically appear in the cart when eligible.
These are Freehand’s favorite legacy printers
Epson SureColor T3270
Epson Artisan 1430
Epson Stylus Photo 1400
Epson SureColor P400
Epson SureColor P800
Canon PIXMA Pro-100
* Series Printers can have different model numbers around the world but all use the same printer driver. Example 1: The Canon iX6820 and iX6850 are both 6800 Series printers. Both printers are supported by AccuRIP Emerald. Example 2: The Epson SC T3270 is a 3200 Series printer, any printer model in the 3200 series will be supported by AccuRIP Emerald.
** The Epson ET-15000 produces high quality prints using Dmax™ dye ink. The paper media sensor sometimes struggles to detect clear film media. The use of low tack paper tape or a paper carrier sheet may be required.
*** Only Roll Media printing supported
Canon iX6820
13×19 printer when paired with Dmax ink kits will deliver top quality and best density. Can generally be found online or locally for less than $300.
Canon iP8720
13×19 printer when paired with Dmax ink kits will deliver top quality and best density.
Epson 1430/1400
13×19 printer when paired with Dmax ink kits as it will deliver top quality and best density.
Epson T3170x
24” roll EcoTank printer that delivers best density and quality prints when paired with Dmax in the black tank.
Epson ET-15000
Pros: Good quality Ecotank printer capable of printing to 13×19 sheets. Delivers quality prints when paired with Dmax in the black tank using MONO or all tanks using ABI.
Cons: Common media sensor issue requiring either a strip of low tac tape to be run down the center of the backside of the film or the use of a paper carrier sheet.
Canon Pixma Pro-100
Pros: Good quality printer capable of printing to 13×19 sheets. Delivers quality prints when paired with Dmax.
Cons: Discontinued by Canon. Canon print head is subject to burning out. Some users seemed to retain a grinding sound within the printer causing hardware failures.
Epson P400Pros: Good quality printer capable of printing to 13×19 sheets. Similar to the Epson 1430. Delivers quality prints when paired with a refillable PK cart filled with Dmax.
Cons: Only capable of printing via the Photo Black (PK) slot from Emerald on both PC and Mac.
Epson P700
Pros: Good quality printer capable of printing to 13×19 sheets.
Cons: Expensive, 3rd party cartridges not fully available therefore remaining a pigment based printer, prints slowly
Epson P800
Pros: Good quality printer capable of printing to a 17” roll.
Cons: No cutting option, user will need to manually cut the roll.
Epson ET-8550
Pros: Good quality Ecotank printer capable of printing to 13×19 sheets. Delivers quality prints when paired with Dmax.
Cons: Filling Dmax in photo black slot is suggested until warranty has expired
Epson L1300
Pros: Good quality Ecotank printer capable of printing to 13×19 sheets. Delivers quality prints when paired with Dmax.
Cons: ABI not supported
Epson WF-72/77/78 Series
Pros: Good quality printer. Delivers quality prints when paired with Dmax. ABI recommended when not using Dmax.
Cons: Some issues with media preferences
Epson 4900
Pros: Good quality printer capable of printing to 17” roll. Delivers quality prints when paired with Dmax.
Cons: Discontinued by Epson.
Epson T3270
24” roll printer that delivers best density and quality prints when paired with a Dmax refillable PK cartridge. When using stock OEM inks, ABI is suggested for “rich” black quality.
Freehand’s top rated printers are in BLUE.
| Brand | Model | Recommended | ||||
|---|---|---|---|---|---|---|
| Canon | Pixma iX6820 / 6800 series* | |||||
| Canon | Pixma iP8720 / 8700 series* | |||||
| Canon | Pixma Pro-100 | |||||
| Canon | Pixma G1020 series | |||||
| Epson | ET-15000** | |||||
| Epson | ET-16600 series* | |||||
| Epson | ET-8500 series* | |||||
| Epson | ET-8550 series* | |||||
| Epson | ET-2720 | |||||
| Epson | Artisan 1430 | |||||
| Epson | Stylus 1400 | |||||
| Epson | SC-P400 series* | |||||
| Epson | SC-P700 series* | |||||
| Epson | SC-P800 series* | (Roll Only) | ||||
| Epson | SC-P900 series* | (Roll Only) | ||||
| Epson | SC-T5200 series* | |||||
| Epson | SC-T7200 series* | |||||
| Epson | SP-4800 | |||||
| Epson | SP-4880 | |||||
| Epson | WF-7210 | |||||
| Epson | WF-7710 | |||||
| Epson | WF-7720 | |||||
| Epson | WF-7840 | |||||
| Epson | XP-15000 series* | |||||
| Epson | SC T3270 / 3200 series* | |||||
| Epson | SP-4900 | |||||
Freehand’s top rated printers are in BLUE.
Artisan 1430
ET-15000**
ET-16600 series*
ET-8500 series*
ET-8550 series*
ET-2720
SC-P400 series*
SC-P700 series*
SC-P800 series* ***
SC-P900 series* ***
SC-T5200 series*
SC-T7200 series*
SP-4800
SP-4880
Stylus 1400
WF-7210
WF-7710
WF-7720
WF-7840
XP-15000 series*
Pixma G1020 series*
Pixma iX6820 / 6800 series*
Pixma iP8720 / 8700 series*
Pixma Pro-100
SC T3270 / 3200 series*
SP-4900
* Series Printers can have different model numbers around the world but all use the same printer driver. Example 1: The Canon iX6820 and iX6850 are both 6800 Series printers. Both printers are supported by AccuRIP Emerald. Example 2: The Epson SC T3270 is a 3200 Series printer, any printer model in the 3200 series will be supported by AccuRIP Emerald.
** The Epson ET-15000 produces high quality prints using Dmax™ dye ink. The paper media sensor sometimes struggles to detect clear film media. The use of low tack paper tape or a paper carrier sheet may be required.
*** Only Roll Media printing supported
Canon iX6820
13×19 printer when paired with Dmax ink kits will deliver top quality and best density. Can generally be found online or locally for less than $300.
Canon iP8720
13×19 printer when paired with Dmax ink kits will deliver top quality and best density.
Epson 1430/1400
13×19 printer when paired with Dmax ink kits as it will deliver top quality and best density.
Epson T3170x
24” roll EcoTank printer that delivers best density and quality prints when paired with Dmax in the black tank.
Epson ET-15000
Pros: Good quality Ecotank printer capable of printing to 13×19 sheets. Delivers quality prints when paired with Dmax in the black tank using MONO or all tanks using ABI.
Cons: Common media sensor issue requiring either a strip of low tac tape to be run down the center of the backside of the film or the use of a paper carrier sheet.
Canon Pixma Pro-100
Pros: Good quality printer capable of printing to 13×19 sheets. Delivers quality prints when paired with Dmax.
Cons: Discontinued by Canon. Canon print head is subject to burning out. Some users seemed to retain a grinding sound within the printer causing hardware failures.
Epson P400Pros: Good quality printer capable of printing to 13×19 sheets. Similar to the Epson 1430. Delivers quality prints when paired with a refillable PK cart filled with Dmax.
Cons: Only capable of printing via the Photo Black (PK) slot from Emerald on both PC and Mac.
Epson P700
Pros: Good quality printer capable of printing to 13×19 sheets.
Cons: Expensive, 3rd party cartridges not fully available therefore remaining a pigment based printer, prints slowly
Epson P800
Pros: Good quality printer capable of printing to a 17” roll.
Cons: No cutting option, user will need to manually cut the roll.
Epson ET-8550
Pros: Good quality Ecotank printer capable of printing to 13×19 sheets. Delivers quality prints when paired with Dmax.
Cons: Filling Dmax in photo black slot is suggested until warranty has expired
Epson L1300
Pros: Good quality Ecotank printer capable of printing to 13×19 sheets. Delivers quality prints when paired with Dmax.
Cons: ABI not supported
Epson WF-72/77/78 Series
Pros: Good quality printer. Delivers quality prints when paired with Dmax. ABI recommended when not using Dmax.
Cons: Some issues with media preferences
Epson 4900
Pros: Good quality printer capable of printing to 17” roll. Delivers quality prints when paired with Dmax.
Cons: Discontinued by Epson.
Epson T3270
24” roll printer that delivers best density and quality prints when paired with a Dmax refillable PK cartridge. When using stock OEM inks, ABI is suggested for “rich” black quality.
Freehand’s top rated printers are in BLUE.
| Brand | Model | Recommended | ||||
|---|---|---|---|---|---|---|
| Canon | Pixma iX6820 / 6800 series* | |||||
| Canon | Pixma iP8720 / 8700 series* | |||||
| Canon | Pixma Pro-100 | |||||
| Canon | Pixma G1020 series | |||||
| Epson | ET-15000** | |||||
| Epson | ET-16600 series* | |||||
| Epson | ET-8500 series* | |||||
| Epson | ET-8550 series* | |||||
| Epson | ET-2720 | |||||
| Epson | Artisan 1430 | |||||
| Epson | Stylus 1400 | |||||
| Epson | SC-P400 series* | |||||
| Epson | SC-P700 series* | |||||
| Epson | SC-P800 series* | (Roll Only) | ||||
| Epson | SC-P900 series* | (Roll Only) | ||||
| Epson | SC-T5200 series* | |||||
| Epson | SC-T7200 series* | |||||
| Epson | SP-4800 | |||||
| Epson | SP-4880 | |||||
| Epson | WF-7210 | |||||
| Epson | WF-7710 | |||||
| Epson | WF-7720 | |||||
| Epson | WF-7840 | |||||
| Epson | XP-15000 series* | |||||
| Epson | SC T3270 / 3200 series* | |||||
| Epson | SP-4900 | |||||
…a Freehand Tradition. True self financing software.
Generate profits from a fully-functional FREE Trial first. Make more money than the cost of the software during the trial period while gaining confidence from this powerful solution for screen-printers. It’s literally cost free to get involved. You can’t afford not to use this legendary business software.
NXT-Moves is built into Separation Studio NXT. Open an up-to-date version of Separation Studio NXT or activate a trial of Separation Studio NXT, go to the NXT-Moves menu, and click “Go to NXT-Moves…”
Purchase
1. Separation Studio NXT color separation software:
Register for Sep Studio NXT trial. Once active you have access to a NXT-Moves trial.
2. NXT-Moves online designer:
Click “Go to NXT-Moves” in the “NXT-Moves” Menu within Sep Studio NXT software. Create a NXT-Moves account login and start designing.
Freehand recommends working trials simultaneously to maximize the FREE fully-functional 8 day trial period. Profit before you purchase.
At Freehand we get it and we keep making things better.
Freehand and you, together we got this.
At Freehand we get it and we keep making things better.
Freehand and you, together we got this.
At Freehand we get it and we keep making things better.
Freehand and you, together we got this.
Shipping fee to be applied at checkout.

Separation Studio™ 4 (Discontinued):
Windows 8 and 10 • Apple El Capitan thru Catalina

AccuRIP™ Ruby (Discontinued):
Windows 8 and 10 • Apple El Capitan thru Catalina

AccuRIP™ Black Pearl (Discontinued) and AccuRIP™ BP SE (Discontinued):
Windows 8 and 10 • Apple El Capitan thru Mojave

Separation Studio™ 3 (Discontinued):
Windows 8 and 10 • Apple El Capitan thru Mojave
At Freehand we get it and we keep making things better.
Freehand and you, together we got this.
Printing direct from Sep Studio™ NXT requires a RIP that supports your printer model installed and configured at the time of printing.
Sep Studio™ NXT supports direct printing through AccuRIP™ Emerald, Ruby, Black Pearl, Black Pearl SE or by any other brand of RIP software that uses a Hot Folder workflow supporting PostScript (.ps) files.
For legacy printer users and ABI renewals Freehand has a variety of solutions to keep you productive. Reach out to us to learn more.
| Brand | Model | Max Film Size | Mono (Photo K) | ABI (All) | Ink | Type |
|---|---|---|---|---|---|---|
| Epson | SC-P800 | 17″ Roll | YES | Epson Pigment | Cartridge | |
| Epson | Stylus Pro 3800 | 13″x19″ | YES | YES | Dmax™ Dye | Cartridge |
| Epson | Stylus Pro 3880 | 13″x19″ | YES | YES | Dmax™ Dye | Cartridge |
| Epson | Stylus Pro 4000 | 17″ Roll | YES | YES | Dmax™ Dye | Cartridge |
| Epson | Stylus Pro 4450 | 17″ Roll | YES | YES | Dmax™ Dye | Cartridge |
| Epson | Stylus Pro 4800 | 17″ Roll | YES | YES | Dmax™ Dye | Cartridge |
| Epson | Stylus Pro 4880 | 17″ Roll | YES | YES | Dmax™ Dye | Cartridge |
| Epson | Stylus Pro 4900 | 17″ Roll | YES | YES | Dmax™ Dye | Cartridge |
| Epson | Stylus Pro 7000 | 24″ Roll | YES | YES | Dmax™ Dye | Cartridge |
| Epson | Stylus Pro 7600 | 24″ Roll | YES | YES | Dmax™ Dye | Cartridge |
| Epson | Stylus Pro 7700 | 24″ Roll | YES | YES | Dmax™ Dye | Cartridge |
| Epson | Stylus Pro 7800 | 24″ Roll | YES | YES | Dmax™ Dye | Cartridge |
| Epson | Stylus Pro 7880 | 24″ Roll | YES | YES | Dmax™ Dye | Cartridge |
| Epson | Stylus Pro 7890 | 24″ Roll | YES | YES | Dmax™ Dye | Cartridge |
| Epson | Stylus Pro 7900 | 24″ Roll | YES | YES | Dmax™ Dye | Cartridge |
| Epson | Stylus Pro 9450 | 44″ Roll | YES | YES | Dmax™ Dye | Cartridge |
| Epson | Stylus Pro 9600 | 44″ Roll | YES | YES | Dmax™ Dye | Cartridge |
| Epson | Stylus Pro 9700 | 44″ Roll | YES | YES | Dmax™ Dye | Cartridge |
| Epson | Stylus Pro 9800 | 44″ Roll | YES | YES | Dmax™ Dye | Cartridge |
| Epson | Stylus Pro 9880 | 44″ Roll | YES | YES | Dmax™ Dye | Cartridge |
| Epson | Stylus Pro 9890 | 44″ Roll | YES | YES | Dmax™ Dye | Cartridge |
| Epson | Stylus Pro 9900 | 44″ Roll | YES | YES | Dmax™ Dye | Cartridge |
| Epson | Stylus Pro 10600 | 44″ Roll | YES | YES | Dmax™ Dye | Cartridge |
| Epson | Stylus Pro 11880 | 64″ Roll | YES | YES | Dmax™ Dye | Cartridge |
| Epson | SC T3000 | 24″ Roll | YES | YES | Dmax™ Dye | Cartridge |
| Epson | SC T5000 | 36″ Roll | YES | YES | Dmax™ Dye | Cartridge |
| Epson | SC T7000 | 44″ Roll | YES | YES | Dmax™ Dye | Cartridge |
| Epson | SC T3200 | 24″ Roll | YES | YES | Dmax™ Dye | Cartridge |
| Epson | SC T5200 | 36″ Roll | YES | YES | Dmax™ Dye | Cartridge |
| Epson | SC T7200 | 44″ Roll | YES | YES | Dmax™ Dye | Cartridge |
| Epson | SC T3270 | 24″ Roll | YES | YES | Dmax™ Dye | Cartridge |
| Epson | SC T5270 | 36″ Roll | YES | YES | Dmax™ Dye | Cartridge |
| Epson | SC T7270 | 44″ Roll | YES | YES | Dmax™ Dye | Cartridge |
With so many printer models from various manufacturers to choose from screen printers look to Freehand for printer and product selection advice – advice built on comprehensive testing in Freehand’s Lab and supported by decades of industry-specific knowledge and experience.
Printer CERTIFICATION is an expanded role of Freehand thanks to the new engineering of AccuRIP Emerald. Certification allows our skilled team to provide in-depth information about printer models used in film production for screen printers, so you can make an informed decision. The review process is for this specific industry purpose (film printing) and is NOT rating the printer in regard to any other print process.
Certified printers are checked into AccuRIP Emerald giving the user easy toggle control between Mono and ABI black printing. The Mono position defaults to the Photo Black slot of the printer. The ABI position refers to ALL cartridges/tanks being filled with Dmax™ dye ink. Not all printer models are ABI Certified. Review the list of printers and options below. Mac and Windows list are not identical.
Freehand Certifies printers based upon the below criteria – noting that Freehand performed testing with quality Dmax™ ink and DarkStar™ film:
Mono: AccuRIP Emerald has enhanced film production delivering quality and density you’ve come to expect by using a single nozzle and maximizing cartridge-less printers. While software drives the process of film production, the key to film density remains a proper ink type/brand and film type/brand combination. Printing from a single nozzle delivers the high-quality print results you demand to expose great screens.
ABI: not a tech solution more than it’s an economic solution to the old way printers were configured to operate using ink cartridges and microchips. For those that continue using older printers with refillable ABI ink tanks installed that no longer have the ABI feature available in Emerald you’ll use the same Dmax dye from the Photo Black tank to produce dense prints.
All users are welcome to contact sales via email, and support via the online system and ask for an assessment of your setup. The Freehand Team will gladly help you get the best value out of what you have and/or direct you to what is new and a better fit for your business.
Eventually all screen printers will want or need to convert over the NEW style of ECO friendly bulk ink tank printers never looking back. The past was good, but the future is better.
…a Freehand Tradition. True self financing software.
Generate profits from a fully-functional FREE Trial first. Make more money than the cost of the software during the trial period while gaining confidence from this powerful solution for screen-printers. It’s literally cost free to get involved. You can’t afford not to use this legendary business software.
All users should have an active or expired PrintFab trial installed before activation.
Following purchase navigate to your MY ACCOUNT, under the “My Software Licenses” dropdown locate, highlight, and copy the PrintFab serial number.
Next, go to this page of PrintFab ZEDOnet’s Webiste and paste the serial number into the “License order code” field. Properly fill out the rest of the form, and click “Send”. ZEDOnet will email you a license Keyfile used to activate the software.
On Windows: Open PrintFab, in the lower right corner of the PrintFab window Click “About/License”. Then click “Select license Keyfile…”. Now locate and select your downloaded license Keyfile in the file browser, and click “Open”. Click “OK” in the following windows.
On Mac: Locate your downloaded license Keyfile in Finder then double click it. In the PrintFab windows that appear click “Yes”, enter your password, click “OK”, then click “OK” again.
Quality: 1440dpi
Halftone Screen Mode: Single Black
Screen Ink Saturation: 220%
Screen LPI: 40
Screen Angle: 25
Screen Shape: 0 round
Drop Size: 2 medium
Quality: 1440dpi
Halftone Screen Mode: Single Black
Screen Ink Saturation: 220%
Screen LPI: 40
Screen Angle: 25
Screen Shape: 0 round
Drop Size: 2 medium
Quality: 2880dpi
Halftone Screen Mode: Single Black
Screen Ink Saturation: 220%
Screen LPI: 40
Screen Angle: 25
Screen Shape: 0 round
Drop Size: 3 large
Quality: 1440dpi
Halftone Screen Mode: Single Black
Screen Ink Saturation: 220%
Screen LPI: 40
Screen Angle: 25
Screen Shape: 0 round
Drop Size: 2 medium
Quality: 2400dpi
Halftone Screen Mode: Single Black
Screen Ink Saturation: 300%
Screen LPI: 40
Screen Angle: 25
Screen Shape: 0 round
Drop Size: 2 medium
For All Black (Multi Black) Printing
Quality: 720dpi
Halftone Screen Mode: Multi Black
Enable Ink Cartridge Slots with Black Ink installed
Screen Ink Saturation: 220%
Screen LPI: 40
Screen Angle: 25
Screen Shape: 0 round
Drop Size: 2 medium
For Single Black Cartridge Printing
Quality: 1440dpi
Halftone Screen Mode: Single Black
Screen Ink Saturation: 220%
Screen LPI: 40
Screen Angle: 25
Screen Shape: 0 round
Drop Size: 2 medium
Quality: 9600dpi
Paper: Transparent CF102
Halftone Screen Mode: Multi Black
Enable Ink Cartridge Slots with Black Ink installed
Screen Ink Saturation: 220%
Screen LPI: 40
Screen Angle: 25
Screen Shape: 0 round
Drop Size: 2 medium
Quality: 9600dpi
Paper: Transparent CF102
Halftone Screen Mode: Multi Black
Enable Ink Cartridge Slots with Black Ink installed
Screen Ink Saturation: 220%
Screen LPI: 40
Screen Angle: 25
Screen Shape: 0 round
Drop Size: 2 medium
Quality: 2880dpi
Halftone Screen Mode: Single Black
Screen Ink Saturation: 220%
Screen LPI: 40
Screen Angle: 25
Screen Shape: 0 round
Drop Size: 3 large
For All Black (Multi Black) Printing
Quality: 1440dpi
Halftone Screen Mode: Multi Black
Enable Ink Cartridge Slots with Black Ink installed
Screen Ink Saturation: 220%
Screen LPI: 40
Screen Angle: 25
Screen Shape: 0 round
Drop Size: 3 large
For Single Black Cartridge Printing
Quality: 1440dpi
Halftone Screen Mode: Single Black
Screen Ink Saturation: 220%
Screen LPI: 40
Screen Angle: 25
Screen Shape: 0 round
Drop Size: 3 large
Quality: 1440dpi
Halftone Screen Mode: Single Black
Screen Ink Saturation: 220%
Screen LPI: 40
Screen Angle: 25
Screen Shape: 0 round
Drop Size: 2 medium
Quality: 1440dpi
Halftone Screen Mode: Single Black
Screen Ink Saturation: 220%
Screen LPI: 40
Screen Angle: 25
Screen Shape: 0 round
Drop Size: 2 medium
For All Black (Multi Black) Printing
Quality: 1440dpi
Halftone Screen Mode: Multi Black
Enable Ink Cartridge Slots with Black Ink installed
Screen Ink Saturation: 220%
Screen LPI: 40
Screen Angle: 25
Screen Shape: 0 round
Drop Size: 2 medium
For Single Black Cartridge Printing
Quality: 1440dpi
Halftone Screen Mode: Single Black
Screen Ink Saturation: 220%
Screen LPI: 40
Screen Angle: 25
Screen Shape: 0 round
Drop Size: 2 medium


